Creating Film and Cinematic Looks
Creating a Film Look
When it comes to digital photography, many of us strive to create images that mimic classic film. Whether you’re a fan of the grainy, soft look of Kodak Portra or the deep contrast of Fuji 400H, recreating the look of film in your digital images can be a challenge.
There are a few key steps that you can take, both in camera and in post-processing, to make your digital photos look more like film.
In Camera Settings
In Camera the first step to achieving a classic film look is to shoot in a “raw” format. Shooting in raw gives you the most latitude to work with the image in post-processing, and will result in a more film-like look.
You should also set your camera to use a “flat” picture profile. This will give you a more neutral base to work with, and will help you achieve a more film-like look.
You can also work with longer exposure times to add just a tiny bit of motion blur.
Post-Processing
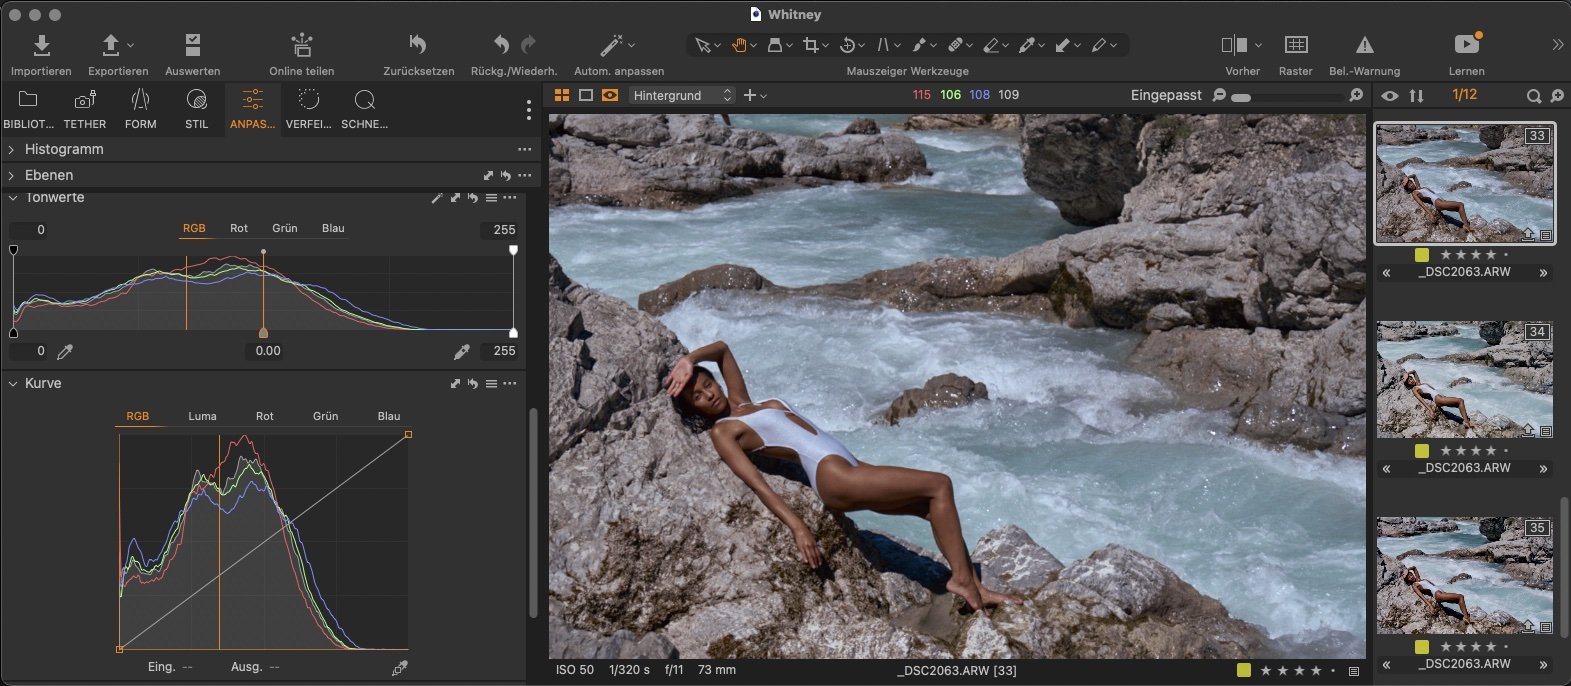
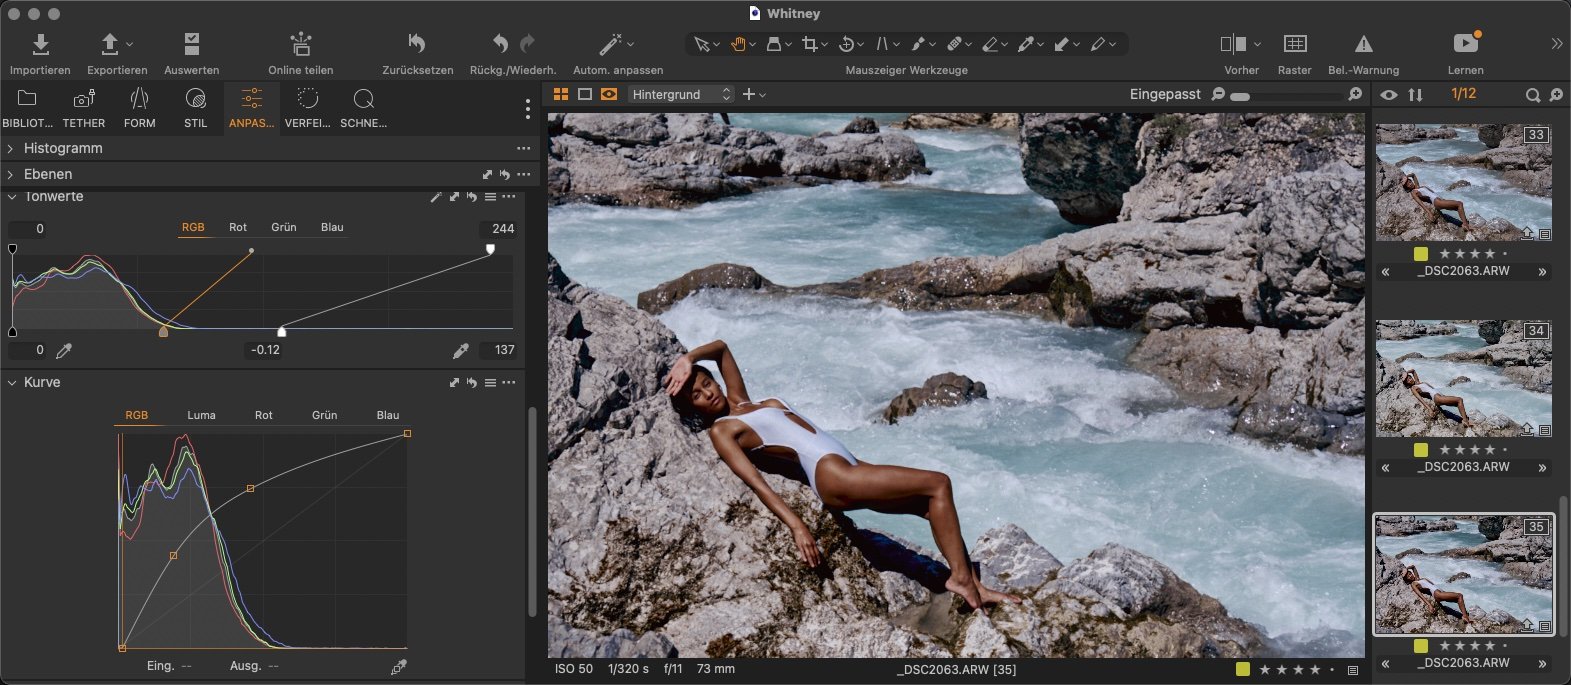
Once you’ve taken your photos, the next step is to process them in post. For this, you’ll want to use a high-end editing program such as Capture One to work on the white point, black point, contrast, brightness and color representation as well as sharpness and grain.
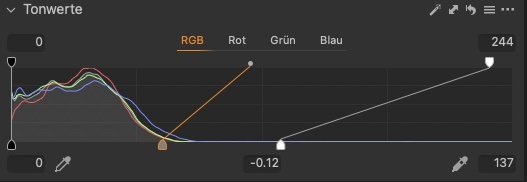
Working on Highlights and Lowlights with the Levels Tool
One of the key tools for creating a classic film look is the levels tool. This tool allows you to adjust the black and white points for the image, allowing you to manipulate the contrast of the image.
For example the white point of classic film usually is not “hard white”, meaning that if you pull back the white point from the right top corner of the levels tool, the whites will be a little softer.
At the same time the black point of classic film may not be full black and at the same time shades often tend to be crushed. The crush the shades you can pull back the bottom left corner of the levels tool. If you also pull back the top left of the levels tool these crushed shades will appear in a dark grey instead of full black.
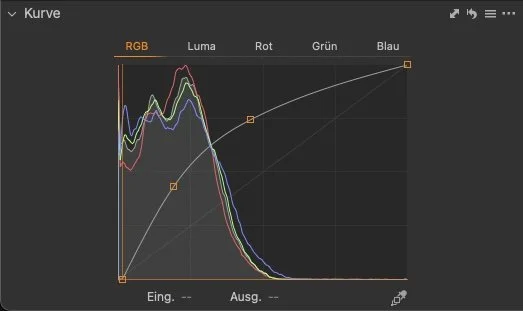
Working on Contrast, Brightness and Color Characteristics with The Curve Tool
While color and brightness of digital camera sensors are interpreted in a linear fashion, classic film tends to have non-linear characteristics. E.g the brightness of highlights changes very little over a large dynamic range in film stock. Shades on the other hand are very sensitive. This leads to strong low and midtone contrasts while the highlights are flat. You can apply similar characteristics by creating a curve. - Comment: I often use a U-shaped curve with a steep slope rising from the black point and flattening out on the white point. This will create greater contrast and saturation in the image, while the highlights and e.g. the skin tones are soft.
You should also use the curve and level tool to adjust the midtones. This will help you achieve a more classic film look.
Working with the Sharpening Tool
When it comes to sharpening or desharpening images, it’s best to err on the side of desharpening. Sharpening can make images look overly digital and harsh, while desharpening can help create a softer look.
You may also want to add a bit of grain to your images. This can help give your images a more classic film look, as well as add a bit of texture.
Creating a Cinematic Look
If you’re looking to create a more cinematic look, you can use the same principles discussed above. However, you may want to increase the contrast of the image, as well as increase the sharpness.
For a cinematic look, you should also increase the saturation of the image, as well as add a bit of vignetting.
Please also don’t forget to check out the styles from my shop.